
 Thank you so much for your interest and comments about my Photos of Vintage Photos Collection posted on yesterdays Pink Saturday. I thought I'd elaborate on my 'Setting Em'Up" techniques...not really techniques, but more like grabbing this and that, borrowing from here and there, and well, okay...a few Techniques for Successful Setups.
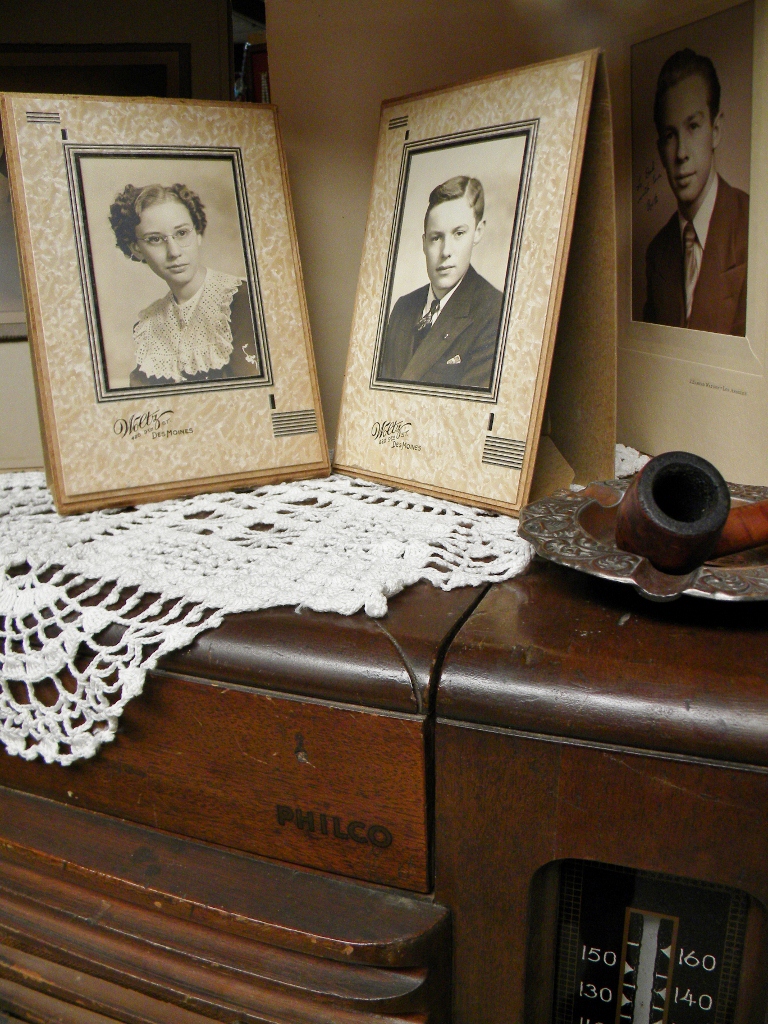
First, I will tell you that many of the photos in my collection are NOT my People/Ancestors, but Vintage Photos that I find in my Junktique Adventures. I do buy a few, but mostly, I take photos of them in settings like the one shown here of the old Philco.
Of course it helps that I am an Antique Dealer and have access to an Antique Shop where I am able to 'SetEm'Up' and photograph. Most Antique Shops are very accomodating about photographing in their shops, but it is a good idea to ask for permission.
Sometimes finding the photos can be a challenge as many Antique Dealers with old photos tend to hide them in boxes and stick them under the bottom shelf where only dustbunnies and creepy crawlies live. You'd think they really didn't want to sell them, and if you are lucky enough to find a whole Album of old pictures...you have hit the jackpot!

 Once the 'SetUp' is ready, I take multiple photos from different angles. Some with the entire 'SetUp' showing the booth in the background and then Closeups.
Here are a few Rules of Design to consider when 'Setting Up' a Still Life:
~Something Large, Something Medium and Something Small.
~Group the Lrg-Med-Sm in THREE's.
~Consider Colors and Textures
~Overlap, Layer and Stack
Turn your camera for verticle shots, horizontal shots and diagonal shots.
Much of the fun is in the Editing when you get home to your PC. I use Windows 7 Live Photo Gallery where cropping, exposure, changing Effects, Sizing,and many more Editing features can be used. I also use Paint. It is my 'Old Standby' for Editing and I often take photos from WinPhotoGallery to Paint for some 'Sue Special Techniques' like these....


Another Paint Collage of my Great Great Aunt Palmyra used in the post

And lastly, my Favorite SetUp Photos...my own Family Memorabilia and Photos.
This one of a letter from my Grandmother Estella, her vase and the photo of my brother and me
with our Grandmother we met only once.
That story on Tracks of My Texas Ancestors
I hope some of my Photo SetUp Ideas will give you some
Ideas and Inspiration!
Thanks again for your interest in my Vintage Photo Collections,
CollectInTexas Gal and Tracks of My Texas Ancestors.
PS...One More Tip...Most any Photo can be made to look Vintage! Just change it to Black&White or Sepia Tones. You can do this in most of your PC Photo Programs. In Windows Live Gallery it is an EFFECT choice. And for even more Fun Effects...give PICNIC a try.
So interesting - but one has to have imagination too, which you seem to have in abundance!
ReplyDeleteHi Sue! Happy Sunday to you! My daughter Rebekah wishes she could meet and talk with your sweet mom! She loves history and writing! Hugs Anne
ReplyDeleteGreat ideas, Sue and I love your old photos and set-ups . . . I am getting some ideas together. I have lots of letters from my Oma (grandmother) in Germany and some of her items . . . hmmm . . . the wheels are spinning! Thanks for this and look forward to more of your wonderful posts.
ReplyDeleteHey Sue...so sorry I have been absent from commenting on your blog. I think I have finally figured out the issue and have switched search engines and now I can post to blogs again. It was so frustrating. I love the tutorial and for us uncreative folks, this is wonderful. Looking forward to keeping up with the family history.
ReplyDeleteDenis
Thanks for all the interesting tips about vintage photographs. I adore vintage pictures of all types and always come home with adopted ancestors when I find them at a good price!
ReplyDeleteI so enjoy the posts about your ancestors and you have so many terrific pictures to go along with the stories. I have stories, but not a lot of the really old photographs other than my Grandparents. I have a few, but not many!
Keep the stories coming!
Great tutorial especially for someone like me who isn't real strong in the creativity department. I like the grouping of large=medium and small together.
ReplyDelete