BLOGGER PAGES

2/27/11

The GlutenFree Bread Baking RoundUp...A Tutorial

All My Flops + Recipe Research + Bread Machine + SIL Tips = A Loaf of Bread

First, I have to tell you that I am not an Expert on Gluten-Free Cooking and Baking.
Some of my 'Readers' have requested my Gluten Free Bread Making Recipe!
Through trial and error I have found that this works for me, and I'm glad to share!

The following Picture Tutorial shows the Brands of Ingredients I have used and the Ingredients and Tips are listed under each picture.

My Recipe is a combination of several Recipes gleaned from several sources, which will be given credit with the ingredient list.

The Gluten Free Flour Mix

This combination of Flours and Corn Starch make a Canister of GF Flour Mix the size of my Apple Canister.

3 cups Brown Rice Flour - Bobs Red Mill
3 cups Corn Starch - Hill Country Brand from HEB
2 cups Soy Flour - Hodgson Mill
1 cup Masa Harina - Maseca Corn Flour

(this site has lots of  Info for GlutenFree Baking)
(see Frequently Asked Questions...#5)

Measure all flours in LARGE bowl and Blend together...I use a Whisk. 
In another LARGE bowl using a Flour Sifter, transfer the flour to the sifter and sift to blend and smooth out any lumps.  This may or may not make a difference in the flour blending, but I like sifting because my Grandmother Minnie and my Mom always sifted flour.  It's a Good Thing!  Fill your Canister!

Recipe for One Loaf Baked In Bread Machine 
Before Mixing...Know About Your Bread Machine!!!

The Dry Ingredients


3 cups of Gluten Free Flour Mix ~ It's in Your Canister...neat huh!
1/4 to 1/2 cup of Sugar ~  I like it Sweet - Hill Country Fare HEB
1 cup Dry Milk Powder ~ I use non-fat - Hill Country Fare HEB 
1/4 teaspoon of salt
(Express Bake requires less salt than other settings...less salt provides a higher loaf)
2 1/2 teaspoons Xanthan Gum 
(found at Health Food Store ~ kind of expensive at $12.99 this size bag...also found at Walmart in the Gluten Free Isle for about 11.00...it lasts a long time and is critical to GF recipes)

Measure all ingredients into the Flour Sifter placed in a Medium size bowl....sift and set aside!
Notice that the YEAST is NOT USED YET!!!!

These ingredients from...The Gluten-Free Gourmet by Bette Hagman
(some measurement amounts have been modified by me for the Bread Machine)
The Wet Ingredients
Before Mixing The Wet Ingredients 
Know Steps to Loading and Setting Bread Machine 
for
Express Bake
Read the Express Bake Section Carefully! 


3 Eggs ~ My SisterInLaw uses 4...3 worked for me!
1 1/2 cup Warm Tap Water ~ 105 degrees to 110 degrees
(I checked with a meat themometer)
1/2 cup Oil ~ I use Canola
1 teaspoon vinegar ~ I use Cider Vinegar

Whisk together all of these Wet Ingredients.
Take Bread Pan out of Machine and Pour in the Wet Ingredients
(Follow instructions for loading and setting Bread Machine and Express Bake)

My Bread Machine:
Oster 2 lb. EXPRESSBAKE Breadmaker
 

Immediately after the Wet Ingredients gently add the DRY INGREDIENTS to the Pan.
Make a Shallow WELL in the TOP of the Flour Mix
(your Bread Machine will have visual instruction of this step)
Into the Well measure
1 Tablespoon of Sugar
and
1 Tablespoon of Dry Yeast
(always use fast-rising yeast - I use Red Star Quick Rise for Bread Machines)
(be sure and check expiration date on Yeast Jar and refrigerate after opening)

Place the Pan in the Bread Machine according to Instructions.
Set Bread Machine to Express Bake.
(Mine also let's you set the Crust Color...I use Medium)

While the Dough is mixing...
You may have to run a spatula around the edge of the pan...GF Flour is heavier than regular flours.

At the End of the Mix Cycle...Just Before the Rise Cycle
You may want to Pat Down/Smooth/Shape with a spatula the TOP of the Loaf. 
I wet the Spatula with water and  ShapeUp the Top of the Loaf. 

It is okay to open the lid during the Mix and Rise Cycles.

Read Your Bread Maker Instruction Booklet carefully for Use Instructions!

At the end of the Express Bake time...I select BAKE on the machines menu and
BAKE the Bread for 15 minutes more.  I set the timer on my oven.
This makes for a browner and more crusty loaf.

Remember...This recipe and instructions are for Making Bread with Gluten Free Flour.
This bread will be different in Texture and Heavier than Wheat Flour Bread!

As I mentioned in the beginning, this recipe and these Brands and Ingredients work for ME. 
 Be sure and read Labels for allergy warnings and specific ingredients that may be on your list of intolerances! 

I wish you all the Best in Baking GF Bread,


The New Joy of Baking...Bread and Bread Puddin'

The Bread Machine Challenge

Do you have recollections of your first experience with homemade bread? 

I do!  My Grandma Minnie and my Aunt Elsie in a farm house kitchen in Iowa! It was summer and we were visiting all the way from Texas.  And although the highlight of the trip was seeing my cousins who laughed at our yep and ya'll Texas accent, the homemade bread has been the most enduring memory!

In moments of nostalga and memories of  that homemade bread, I've attempted to bake bread the old fashion way with a crockery bowl, an embroidered dish towel, loaf pans, a wooden spoon and an apron sprinkled with flour.  Funny how one remembers the little things, but mostly I wanted to experience the smell and the taste of that warm slice of bread sprinkled with sugar and cinnamon...and my Grandma Minnie shooing us out of the kitchen to sit on the back porch steps eating 'Sugared Homemade Bread". 

Okay, enough of the Old Fashion Way!  Good Grief, Sue, it's 2011. 
 Minnie and Elsie would be amazed at todays Bread Making Machine,
and would be hanging up their floured aprons and using that yellow crockery bowl for apples and oranges.

 Is She not a Thing of Beauty?  Crockery bowl, wooden spoon, floured kneading board and oven all in one!

My first attempt in the bread machine was not a Thing of Beauty, but it tasted good and set me up for the 'Challenge of Making and Baking Bread Pudding'.

I posted about that Challenge for Pink Saturday.  It's in the post below...
Bath Baking Bread Pudding.

If you have never used the Water Bath-Bain Marie Method, you'll want to see what that is all about.  I'm here to tell you....it's very cool hot easy method for baking puddings and custards.

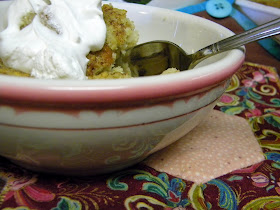
Innovations for this Bread Pudding recipe...besides the Water Bath...were the additions of finely crumpled 'Flopped First Baked Bread', a couple of tablespoons of Texas Peach Jelly to reduce the amount of sugar, and low fat milk.

The Greatest Challenge in my Bread Making is the use of Wheat/Gluten Free Flour!
It's been a Trial and Error Old Fashion Baking Bread Series of Flops!
Until Now!  Thank-you to my New Oster Bread Machine and the Express Bake Setting!
Thank-you Thank-you to My Sister-In-Law Linda...she's a GlutenFree Bread Machine Baker!

And Now some of the Rewards.....


Bread Puddin'

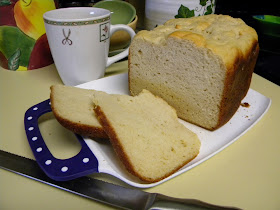
Loaf of Bread

French Bread Sticks Breakfast

...and Memories of my Grandmother Minnie's Home Sweet Home.

Linking To
at The Little Red House
 

2/25/11

Bath Baking Bread Pudding for Pink Saturday!


Are you wondering where the Pink Pudding is?

I could have made it Pink, but decided that since it wasn't in the New Joy of Cooking  Bread Pudding Recipe, I'd better not take a chance on messing up.  I did that once already this week...messed up a recipe.

In fact, my MessedUp Recipe is the reason I made Bread Pudding.  One of those if you happend to 'Get Lemons...Make Lemonade' deals!


Yep, I BAKED BREAD!  This is my SECOND attempt.  WhaLa!  It really does look like Bread!
Let me give you a bit of background information on Me and Bread!  I'm allergic to Wheat!
I've done without bread for several years! 
 It's been okay having corn tortilla sandwiches and making corn bread.
I've found several other flours I use for cooking and corn starch is a staple in my cupboard!
I've been to LAZY to MAKE BREAD...until NOW! 

I finally got a Bread Machine!

OMGosh, I thought this was going to be sooooo easy....even with the Gluten Free Flour Mix.  That's another post..."I Made Flour"!

And you know if I'd had the right instructions for the first batch, it might have been better.

Anyway, the first batch baked waaaay to long and looked like ..... indescribable....I should have taken a picture.  It tasted good!  So I crumbled it up for the Bread Pudding! 

Now, this was my first attempt at making bread pudding and since I started my New Joy of Cooking Challenge in January,  I thought this would be a good time try out it's Bread Pudding Recipe.  How hard could it be?


Not too hard and I had all the ingredients....until....I got to....
Bake at 350 degrees in a Water Bath aka Bain-Marie!
Marie who?
I don't often have to do research before baking! 
Thankfully The New Joy had a reference with pictures for the Water Bath Baking Method!
It's pretty cool, Ya'll !!!

(click on photo to enlarge)
The Water Bath is the cook's principal means of managing heat during the cooking of custards.  By baking a dish of custard in a larger pan of water, the cook partially insulates the custard from the oven's heat and thereby protects it from overcooking.

Notice the water level line and how much water was left after baking the bread pudding....
which I now know is a custard! 
How was that Bread Pudding/Custard?  I'm glad you asked!!!

It was Yummy!
I am Tickled Pink with BathBaking!
and
To Be Participating in
As Always, thanks Beverly for making Saturday Pink!

2/24/11

Trippin' In Texas With-a TomTom

The Letter T in TEXAS....Boy Howdy do WE HAVE T's!
Yep, it's another Road TRIP...this time with HiHoney Doin' the Drivin'... last week for the Letter S, I shot pictures from the SteeringWheel...remember?  I also Tricked Ya'll all the way down Hiway 67 to TheEnd with the  Road TRIP Game...remember?  If you missed it and want to catch up...HERE's the link.

Without further AhDo...(that's TexasTalk for BS)...let's get the Truck and Trailer Rollin'!
(I'll try not to Shoot the Bull with Ya'll, too much....I'd rather show Ya'll my Texas'T' PhoTo's)

TEXAS TREES

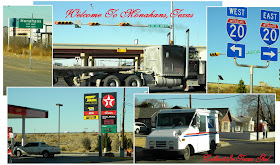
A TEXAS TOWN
(click on this photo to enlarge)

TEXAS TRAILS
TEXAS TRASH TO TREASURE

TEXAS TROUGH

TEXAS TIRE
There's alot more Texas 'T's on this Texas TomTom Road Trip, but I guess I'll save some for
U V W X Y and Z!

There is ONE MORE I Posted about yesterday! 
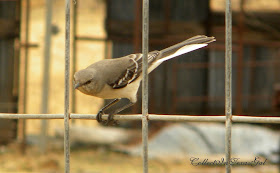
TEXAS TWEETERS
They are featured in the HEADER and the Post Below
and on
CollectInTexas Gal Photo Blog

Linking To
The Letter T

2/22/11

For The Birds....My New Collection!

Focus On Photography ... 2011 Challenge


What a Photo Op! 

It was a Challenge for me!
You see....I had to BE STILL and QUIET!!!!

For more of this Photo Shoot and Cardinals....It's on My PhotoBlog

Weekend Cardinal Watching


Linking To

2/17/11

SO IN LOVE...

...with Sugar and Cream Yarn, Dish Rags and Bonda!

I bet Ya'll were expecting a picture of HiHoney, huh?

 I do have one...of my First Love...HiHoney...I'll show it to you later!
Right now, It's Lovin'Bonda Time!


Yep, Bonda is a Knitting Machine and she makes Me A Knitting Machine Maniac!


And the Fastest DishRag Knitter around!
You see, I must have 24 Dish Rags Done by the middle of April, so I started last week with String and Stix.
By Friday I had TWO...only TWO...Rags knitted!
Do the Math Sue! 
 2 rags x 6 weeks = 12 rags
12 rags - 24 rags = 12 rags short

As Ya'll already know, I'm no Math Wizzard, and even with my Simple Arithmetic I figured out that Another Plan had to Happen!
Bonda to the Rescue!
Yep, by making TWO at a Time in about FIFTEEN Minutes, I had a Whole New Calculating System!
2 rags x (15min. x 4) = 8 rags per hour
So I figured if I could make 8 rags in One Hour....I could make 24 rags in Three Hours!  Yipee!

That leaves me Lots of TIME to Crochet the Edging!
Surely I can Finish in OneThousand ThreeHundred FortyFour Hours!
By that time I'll have Frozen Shoulder and Crampitis of the Hands!
Any Crochet Volunteers?

As promised...here's HiHoney driving his Classic 1979 Silverado....It's a Love Machine, too!

2/15/11

The Letter 'S' is for Signs..Shades..SteeringShots and Sue!


SUE...That's My Name and Collectin' is My Game!

Do ya ever draw a blank on how to start a Post? 

Guess that's a loaded question, and you can probably tell this 'Big S Post' is going to be a bunch of BS from the get go!

What I had in mind was to Share my 'February Road Trip' with ya'll, and since I've always been a Game Player, I thought we'd play A Road Trip Game.


 You see, it's Three Texas Hours to my Mom's, and HiHoney couldn't chauffer me this time.
When HiHoney drives, I entertain myself with NeatONikon's Shooting through the Windshield Mode!
So I Challenged myself to a Shoot From the Steering Wheel Game!

Rule #1...Keep your Eyes on the Road..not on the camera.
Rule #2...You may rotate the camera to the left or right... but Keep Your Eyes On The Road!
Rule #3...You may slow down or stop...but stay in the car!

Okay, are Ya'll Red Ready?  
Since it's February and I'm still in the Red Mode, all the Steering Wheel Shots will have Red and The Letter'S' Somewhere.
Your part in this Game is to See the Red and Find the S's! 
 Every picture worth points....1 point for every Red and 2 points for every 'S'.  

Almost half way there!  Sure glad I got GAS in San Angelo for $2.95.
What's Your SCORE?
The next one is a TrickShot!

No 'S' Point for the next one....just wanted to show you what the Middle of NoWhere in Texas looks like!

Thirty-three Miles ToGo!  With a couple of 'Quick-SlowDown Shots' in Grandfalls!

Grandfalls is the Home of My Texas Ancestors! 
We will have to come back here someday soon...today I have to Stick with Rule #3.
Here's another TrickShot for ya!  Yes there is One 'S'!


Only 8 Miles ToGo!  You'll get the RED here, but unless you are from West Texas you might not get the 'S'!
So, I'll Give Ya'll this One....West Texas SkyScraper!

Well, Ya'll we made it, and I didn't break a single Rule of the 'Shoot From The Steering Wheel Game'. 
Well, okay, just one!  I got out of the Car in Grandfalls and did an OnTheSide Shoot!
I'll Share that Shoot later....maybe for the Letter T for Tricked Ya!
Yep, I Tricked Ya into keeping Score....just so you'd make it to 
The End!

Linking To.....Jenny's Alphabe-Thursday for The Letter 'S'
 

PS....Shoot From The Steering Wheel Game Tip....Set your Camera to Auto Focus and Keep Your Eyes On The Road!  You'll be surprised and amazed at the Shots You Shoot!  Like  this one....